Hi guys, I am Prabakaran welcome to Innovative Codes Academy , In this video we learn about How to create windows instance in AWS cloud ? 1. Create EC2 instance windows 10, 1 GB RAM, 30 GB ROM. 2. In free tier eligible. 3. Create virtual system in cloud.
Step by Step I was explain, How to create windows instance in AWS cloud?
Step-1:
Open your AWS account, Already I was log in my account, Click on EC2

Step-2:
Then click on Instances New, Available in 1st Column

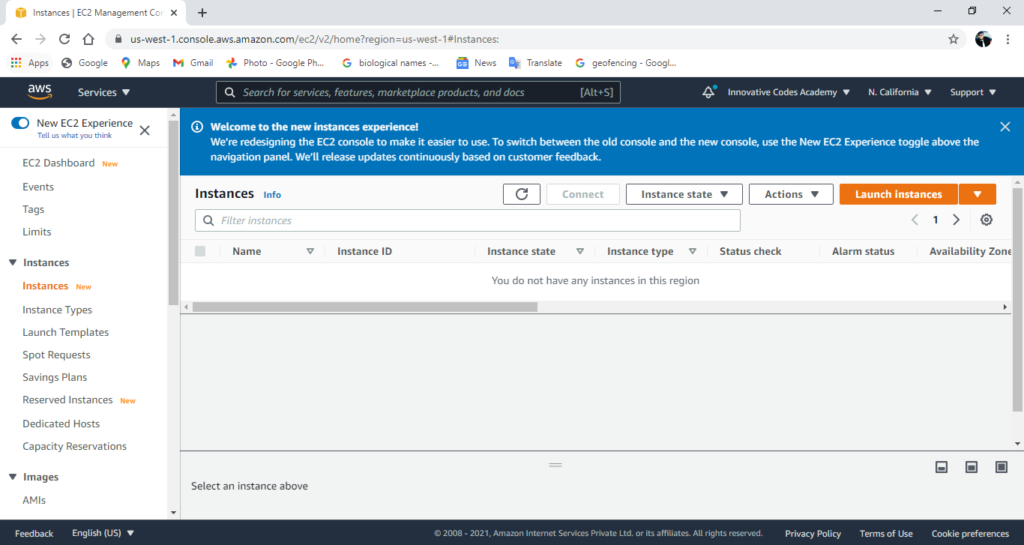
Step-3:
Instances page was open, Click on Lunch Instances.
Step-4:
Then Choose an Amazon Machine Image(AMI), Here I was work in free tier only, Select free tier only.

Step-5:
Next select the Microsoft Windows Server 2019 Base.

Step-6:
Next Choose an Instance Type, Here I was select t2.micro(For free tier eligible), 1 GB RAM then click on Next: Configure Instance Details.

Step-7:
Next Configure Instance Details then click on Next: Add Storage.

Step-8:
Here I was set my ROM 30 GB, Then next click on Next: Add Tag.

Step-9:
Here click on Add Tag button, I hope you will see that.

Step-10:
Here I was give server name, Its user defined, My server name is MyServer1, Next click on Next: Configure Security Group.

Step-11:
Here Configure Security Group, Select RDP Protocol for windows, RDP stands for Remote Desktop Protocol, Then select Source Anywhere because access in anywhere, Next click on Review and Launch.

Step-12:
Here Review Instances Launch , Then click on Launch.

Step-13:
One pop up window was open here you can select an existing key or create new key pair, I was create a new key pair.

Step-14:
After give key pair name click on Download Key Pair, Automatically key pair will be download.

Step-15:
Here I was show you my key pair Download file MyWindowsKey.pem.

Step-16:
Next scroll down click on Launch Instances.

Step-17:
Successfully my Instances are now launching.

Step-18:
Next scroll down click on View Instances.

Step-19:
My instances are now pending state wait few minutes after refresh the instances come back to Instances in Running state.

Step-20:
Next check the Status Check, Wait until System Check was 2/2 Checks Passed, Successfully system check 2/2 checks passed system status checks and Instance status checks.

Step-21:
Next click on Connect button, I hope you will see that, Connect to instance page was open, then click on RDP client.

Step-22:
RDP client tab was open, Here given Public DNS name given, User name and Password.

Step-23:
Click on Download remote desktop file, File automatically download I hope you will see that MyServer1.rdp, Then get Password click on Get password, Next Get windows Password page was open.

Step-24:
Here decrypt my Windows password, Click on Browse then select the download key pair.

Step-25:
Click on open ,My password encoding key was decrypt in this area, I was show you my windows password.

Step-26:
After select key pair file, I hope you will see that, Then click on Decrypt Password

Step-27:
Successfully decrypt my password, Then Copied the password.

Step-28:
Next navigate to open the Download MyServeri.rdp

Step-29:
One pop up window was open Remote Desktop Connection then click on Connect.

Step-30:
One pop up window was open here enter your copied password, Then click on OK button.

Step-31:
Next click on ok button.

Step-32:
Next one pop up window was open Remote Desktop Connection click on Yes.

Step-33:
Remote Desktop Connection

Step-34:
Successfully create my windows instances.

Step-35:
Here I was show my system properties.

Thank You for visiting my website.